Saturday September 10 I drove up to Port Townsend for the annual Wooden Boat Festival. As usual, the joint was very busy with plenty of people. I wanted to take the PTPuffin (who hasn't been wet since mid July because of the rest of life), but I didn't want to fight all the other boats and boaters at the festival.
Luckily, I ran into Dale who let me crew for him on Luna for about 4 hours in the PM for a wonderful little sail. We puttered around for awhile then found Mike in Tor and Simeon in Noddy. Skol sailed with us as well. Mike even got the spinnaker deployed on Tor for awhile.
Afterwards, Dale and I had a beer and hung out. We ran into Jackie Monies. I didn't even know she would be around. It was nice to see her again.
Next year, I would like to take an extra day off and put the PTPuffin in the water and maybe stay on her for the weekend.

A journey to sail Scamp number 284.
Saturday, September 26, 2015
Tuesday, September 15, 2015
Footwell
Howard's idea of a footwell has generated a lot of interest. I thought I'd take a quick post to describe mine and the decisions I made.
I think Howard was the first to mention the footwell as a drainage well. That made sense to me that it would be at the lowest point of the boat. Most people say that bailers in the aft transom wells do not work.
In the below picture, you can see the open hatch at the aft of the boat. There are no wells behind it because I didn't bother with them. You can also see the two empty spots at the bottom of the foot well.
 |
| Footwell looking aft. |
 |
| Close up of the footwell looking fore. |
The cutouts for the bailer wells were pre-made when I reversed the tail of the sole and laid that down inside the already doubled portion of the hull.
Now I have space for bailers in the lowest spot of the boat. Unfortunately, Sergei says that a mini bailer that low in the water does not work. I'm considering buying the larger bailers. If anyone has opinions on what might work, please let me know.
 |
| The height of the hatches matches the sole fillers |
You can also see in the above pictures that the height of the hatch covers is very similar to the height of the 6mm plywood pieces. This is by design. I can lay down on the entire floor without any untoward bumps underneath me. Sleeping in a bag with a thin camping pad and my two yoga seat pads is very comfortable. No lumps at all.
I didn't get any pictures, but I cut two pieces of plywood and glued them together so I'd have side runner channels (pictures before painting in this post). Before I painted, I cut that piece in half. It stores in the cabin and I can pull it out for sleeping or if I want to run without a footwell for some reason.
Sunday, July 26, 2015
Bronze ring for centerboard cover removal
While in Port Townsend I stopped by the Chandlery and picked up a pull ring and a closed anchor chock.
The anchor chock will go on the bow.
The pull ring was an easy install, so I did that today.
The removal of material wasn't too bad. Forstner bits are great for hogging out material. I had to go deeper than I thought to get the entire pull ring in there.
I didn't get any pictures, but I coated that liberally with epoxy and filled the screw holes.
After it set up a bit, I installed the pull ring and the screws. It'll cure right in there.
The anchor chock will go on the bow.
The pull ring was an easy install, so I did that today.
 |
| Measured and knifed out before applying a chisel |
 |
| Dry fit |
 |
| Ugly shot of the removed material |
After it set up a bit, I installed the pull ring and the screws. It'll cure right in there.
 |
| Finished! |
Red Lantern Rally II
Saturday was the 2nd annual Red Lantern Rally. We had 11 scamps in Mystery Bay, WA.
We had a bit of a sail just after lunch. It was beautiful with all these silly colorful little boats tacking around each other.
At 3:30 the official 2nd annual ice cream race happened. No cheating this year! John and Jackie were about to win in Cowboy Cookies, but John gracefully tacked out right at the very end. Sköl won the race.
Josh presented an award for the first place finisher, an award for the longest distance (Jackie from Oklahoma) and a special award to Dan for #70, who launched for the first time on the day of the rally. Dan's boat turned out just beautiful, he should be proud.
(note the little R2AK sticker on Noddy's port side in the above shot)
Last year there were a lot of blue scamps, this year seemed to be the year of yellow scamps with 2 in attendance, 3 if you count the boot stripe on PT Puffin.
In the above shot, you can see how Dan raised his cabin a few inches.
Mike even briefly sailed Tor with his own homemade spinnaker. Very nice. Wish I would have gotten a picture.
I was looking forward to this all week. I was hoping to top last year's 11 boats, but alas that didn't happen. We just matched it. There is always next year.
I did miss my new friends Brent and Shackleton.
A good time was had by all.
We had a bit of a sail just after lunch. It was beautiful with all these silly colorful little boats tacking around each other.
At 3:30 the official 2nd annual ice cream race happened. No cheating this year! John and Jackie were about to win in Cowboy Cookies, but John gracefully tacked out right at the very end. Sköl won the race.
Josh presented an award for the first place finisher, an award for the longest distance (Jackie from Oklahoma) and a special award to Dan for #70, who launched for the first time on the day of the rally. Dan's boat turned out just beautiful, he should be proud.
 |
| Looking over the nose of PT Puffin to Dan & Howard in #70 |
 |
| (ltor) Cowboy Cookies, Serenity, Snug, Dan's #70, #1 |
 |
| Snug and Phil's Little Tramp (blue). Dan (#70) further out. |
 |
| moments later |
 |
| (ltor) Serenity, Dan & Noddy |
 |
| (ltor) Cowboy Cookies, Tor, Snug, #70 |
 |
| (ltor) Noddy, Skol, Scamp, Little Tramp, PTPuffin, kerfuffle from Oympia |
 |
| (ltor) #70, Serenity |
In the above shot, you can see how Dan raised his cabin a few inches.
Mike even briefly sailed Tor with his own homemade spinnaker. Very nice. Wish I would have gotten a picture.
I was looking forward to this all week. I was hoping to top last year's 11 boats, but alas that didn't happen. We just matched it. There is always next year.
I did miss my new friends Brent and Shackleton.
A good time was had by all.
Thursday, July 23, 2015
Pictures from the Small Craft Academy and Palooza Crooza
Howard Rice and John Welford put on a small craft skills academy July 18 & 19. During the academy, I learned a lot about the scamp and how to sail her.
 |
| Brent's Shackleton |
 |
| capsizing and rescuing Jackie Monies' Cowboy Cookies |
 |
| Brent and Preston in Shackleton |
 |
| Sergei and Tyler in Serenity |
 |
| On the beach at Rat Island (near to far: Cowboy Cookies, Serenity, Scallywag) |
 |
| On the beach at Rat Island (near to far: Shackleton, PT Puffin, Tor) |
There were many more activities and opportunities to learn during the academy. I understand my boat a lot better. Now I just need some time to hone my skills.
Sunday morning about 15 boats left Port Townsend for the Palooza Crooza and headed for Mats Mats Bay. The air was light, so Brent offered us a tow behind his 2.5hp motor.
 |
| Shackleton towing PT Puffin |
 |
| Shackleton with a bit more wind |
 |
| Noddy in dead air |
 |
| Beautiful clouds over Mats Mats. |
I slept in the boat for 4 nights in a row for this journey. There was plenty of room for storage and I slept very well with the yoga mats and a sleeping pad.
I also built a list of tasks:
I also built a list of tasks:
- mast mount a windvane
- install the cleat for the motor slide
- Decide and install either a tiller clutch or a hiking stick (or both)
- Use a clampmeter to find out how many amps the motor uses
- find a better way to charge my battery when on the water
- install real oarlocks and buy oars
- install a bailer
- install an anchor chock
- install some more tel tales
This weekend is the Red Lantern Rally in Mystery Bay. I'll spend some time up there. I hope we have a good turnout like last year.
Wednesday, July 22, 2015
Back to Port Townsend
Here are some pictures I took in August of the scamp before she was done.
 |
| new scamp |
 |
| scamp |
 |
| Finito! |
 |
| Finished |
 |
| On the star where we layed her down |
 |
| Me and PT Puffin |
And here is a video I made from shots of our build in August 2014.
Sunday, July 12, 2015
duck canvas cover
Building a rain cover is the last thing I need to do before I head to the Palooza Crooza.
I'd been messing with this one in my head for quite awhile, but hadn't made any final decisions until today.
I knew I needed good tension from to back. I toyed with the idea of putting rotating turnbuttons on the top of the cabin roof, but didn't like how that would look or how it could snag.
I came up with the idea to have a bungee in the hem of the cover that held it over the lip on the cabin top.
I attached small bronze cleats on either side of the cabin.
I also found some duck canvas on sale. That sealed the deal as to what fabric to use.
I hadn't used a sewing machine in quite some time, but I dragged ours out and started to sew it all up.
I added a loop handle on the front. You can see that in the above picture. I'll have some bungees to tie it to the mast to keep tension
I also used turn buttons on the aft transom to hold the canvas. I only have 2 on there at the moment. I will have to change that, but for now it's ok.
I'd been messing with this one in my head for quite awhile, but hadn't made any final decisions until today.
I knew I needed good tension from to back. I toyed with the idea of putting rotating turnbuttons on the top of the cabin roof, but didn't like how that would look or how it could snag.
I came up with the idea to have a bungee in the hem of the cover that held it over the lip on the cabin top.
I attached small bronze cleats on either side of the cabin.
 |
| cabin side cleats |
I also found some duck canvas on sale. That sealed the deal as to what fabric to use.
I hadn't used a sewing machine in quite some time, but I dragged ours out and started to sew it all up.
 |
| Sewing machine and burgundy canvas. |
 |
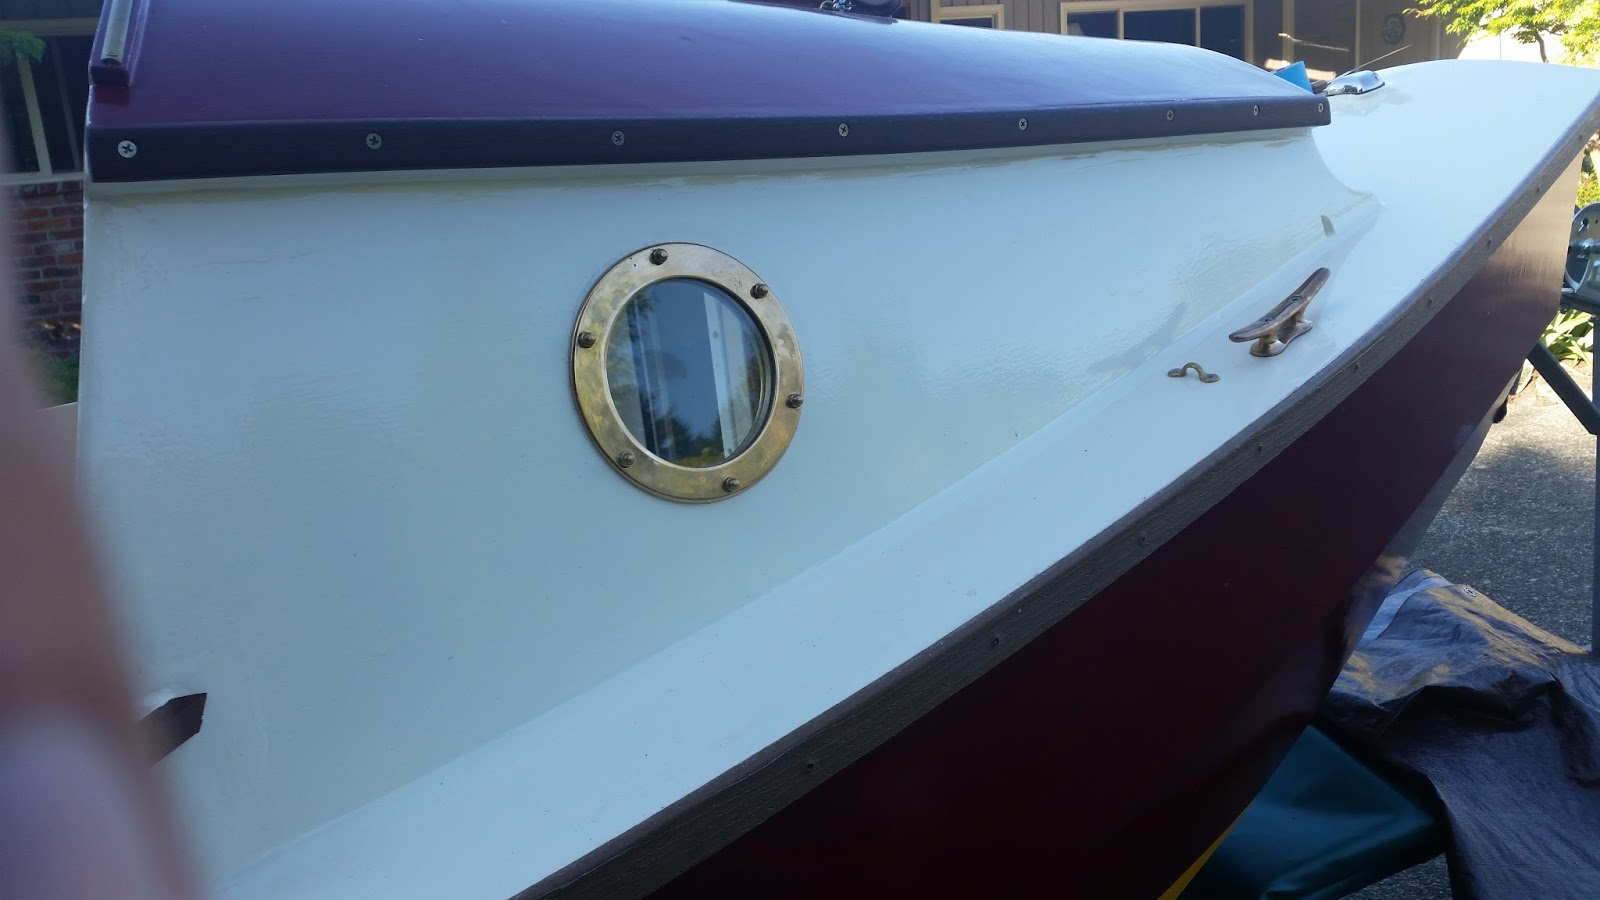
| Full side shot of the attached canvas. |
 |
| turn button stud under the gunwale. |
 |
| you can see the loop in the front hem. |
I also used turn buttons on the aft transom to hold the canvas. I only have 2 on there at the moment. I will have to change that, but for now it's ok.
 |
| rear needs trimming |
Yes, I know duck canvas is not waterproof. I plan to waterproof it with Thomson's water seal. I can always buy some nylon tent rain fly fabric and cut that into a fly as well. It'll likely be quite a bit more expensive, so I'll hold off until I need it.
There is definitely still work to do; the bottom hem needs elastic bands to keep it tight down around the gunwales; the back needs to be trimmed; and it needs some waterproofing. But it'll be ok for the Crooza.
Saturday, July 11, 2015
Rigging gear for sale at Palooza Jul 17-20
At the 2015 Palooza Crooza, I'll have some extra Davey & Co and Tufnol blocks for sale. This is all brand new gear still in the bags and undamaged.
If you are interested in buying any of these, please contact me directly. You can PM ElHeffe on the Scamp message board.
If you are interested in buying any of these, please contact me directly. You can PM ElHeffe on the Scamp message board.
Tuesday, July 7, 2015
Temporary oarlock tent pole holders
I didn't want to mount the bronze oarlocks I bought from Duckworks permanently to the coamings until I knew exactly where I wanted them.
I used some leftover Trex to make blocks that fit around the coamings. They are probably too big, but they're temporary until I decide how I really want them mounted.
I need to figure out how to mount drape the tarp over the pole and mount it to the cabin top and to the stern.
I also need a way to stop the poles from slipping through the bottom of the oarlocks.
I'll also want to tether the blocks. I don't want to lose the oarlocks as I love how they look.
 |
| Trex blocks with a slot |
 |
| Mount the oarlocks to the blocks |
 |
| Finished blocks |
 |
| Tent pole installed (it may be a bit too tall) |
 |
| Shot of the tent pole |
I also need a way to stop the poles from slipping through the bottom of the oarlocks.
I'll also want to tether the blocks. I don't want to lose the oarlocks as I love how they look.
Saturday, July 4, 2015
Gunwale protectors
This is a step I had long been putting off. Long ago, I had cut myself 2x 14' 3/8" x 1 1/4" ipe runners from the edges of a 14' long hand rail that I had been saving for awhile.
It was going to be beautiful.
But the ipe cracked & split when I get screw #4 installed. Not surprising given how hard that stuff is. Unfortunately, it was irreparable.
After thinking about it, I decided that composite material like Trex was best for the job.
HomeDesperateDepot had an acceptable 16' piece of Trex with grooves in the side.
I ripped 1 1/4" off the edges. Then I turned them 90degrees and ripped them at the groove down to about 3/8" thick. Just the right size.
I did realize that the brown on top of the Trex is not the sold color all the way through. It's black on the inside.
This means that the fore and aft edges show black. This is sacrificial and will probably be replaced in a few years, so I'm not too worried about it.
I ran into a second problem, no one makes 1" or 1 1/4" composite screws. The shortest they make is 1 5/8", and that would have been too long and gone right thought the gunwales. I finally found some trim head star drive coated screws at McLendon's. They aren't stainless, but they are outdoor rated. They tend to mushroom out the Trex just a bit, but as the Trex swells, it might go away.
I first attached it with some bedding compound I got from West Marine. I didn't like that stuff at at all. Too hard to work and dried too quickly. Fortunately, I had some biscuit colored silicone caulk. I used that for the rest of the job and it matches the top deck color just beautiful.
(Working with Trex is weird. The rip cuts leave lots of little shavings and the dust is crazy fine. Be sure to wear a particulate filter when working it.)
I sure wish I could post some sailing posts. Unfortunately, the days have been 90 degrees with no wind at all. Maybe I'll still make it out soon.
It was going to be beautiful.
But the ipe cracked & split when I get screw #4 installed. Not surprising given how hard that stuff is. Unfortunately, it was irreparable.
After thinking about it, I decided that composite material like Trex was best for the job.
Home
I ripped 1 1/4" off the edges. Then I turned them 90degrees and ripped them at the groove down to about 3/8" thick. Just the right size.
 |
| Down the shear |
I did realize that the brown on top of the Trex is not the sold color all the way through. It's black on the inside.
This means that the fore and aft edges show black. This is sacrificial and will probably be replaced in a few years, so I'm not too worried about it.
I ran into a second problem, no one makes 1" or 1 1/4" composite screws. The shortest they make is 1 5/8", and that would have been too long and gone right thought the gunwales. I finally found some trim head star drive coated screws at McLendon's. They aren't stainless, but they are outdoor rated. They tend to mushroom out the Trex just a bit, but as the Trex swells, it might go away.
 |
| Shot of the gunwales |
 |
| Here you can kind of compare it to the ipe on the cabin sides |
 |
| A shot of the aft as I was cutting with a fine saw. |
I first attached it with some bedding compound I got from West Marine. I didn't like that stuff at at all. Too hard to work and dried too quickly. Fortunately, I had some biscuit colored silicone caulk. I used that for the rest of the job and it matches the top deck color just beautiful.
(Working with Trex is weird. The rip cuts leave lots of little shavings and the dust is crazy fine. Be sure to wear a particulate filter when working it.)
I sure wish I could post some sailing posts. Unfortunately, the days have been 90 degrees with no wind at all. Maybe I'll still make it out soon.
Thursday, July 2, 2015
Lettering!
I ordered some vinyl lettering from DIYLettering. Lindsey helped me decide on fonts and placement.
It arrived today and I installed it with no problems.
Looks very nice, I think.
I'm currently working on a tent, but trying to get as much sail time as I can (which isn't much, unfortunately). I already had a spare tent pole, I just needed some oarlocks and a way to attach the tent material to the hull. I ordered those from Duckworks.
And certainly I need some tent material, but I'm going to cut a pattern with a tarp.
It arrived today and I installed it with no problems.
Looks very nice, I think.
 |
| Vinyl lettering |
And certainly I need some tent material, but I'm going to cut a pattern with a tarp.
Sunday, June 7, 2015
Please Welcome the PT Puffin!
We had a successful launch!
Today I christened her the PT Puffin. The PT stands Portly Tufted Puffin. This is from a children's book of poetry that I used to read to my kids.
Alaska Mother Goose by Shelley Gill. (clickable link to amazon where you can view inside and see the art)
The portly tufted puffin waddles in the sand;
a plump and shy old parrot, he's clumsy on the land.
But when he tips into the sea, he flaps his wings and flies,
chasing fish beneath the waves, cross salty seaweed skies.
I think it matches her well. She looks like she'd be clumsy but on the water she performs very well and is quite nimble.
The PT can also stand for Port Townsend where her hull was laid down. And I think it adds some whimsey.
We had a great time. The wind was a bit light for sailing, but it's just as well until I get some more time at the helm.
My parents drove out; it was nice to have dad around for the launching. He started this journey, it's best to have him around for the launch.
First, here are some shots of the christening.
I had to check and see if she was leaking around the centerboard pin. There was no leaking at all. That's very good.
A funny thing happened here though. Suddenly we saw that the footwell was filling with water. That was bad, very bad. But when I traced the leak, it was coming from above the waterline from the sole. I couldn't figure out how the water could be coming from up there.
Turns out it was a leaky water bottle. Whew!
Please note that we are reefed here. On the dry, we rigged the sail with two reefs in. This seemed the safest to me. I wasn't familiar with the boat, and I wanted to be safe. I'd recommend reefing on the maiden voyage.
The PT can also stand for Port Townsend where her hull was laid down. And I think it adds some whimsey.
We had a great time. The wind was a bit light for sailing, but it's just as well until I get some more time at the helm.
My parents drove out; it was nice to have dad around for the launching. He started this journey, it's best to have him around for the launch.
First, here are some shots of the christening.
 |
| opening the champagne |
 |
| Christening |
 |
| Christening with champagne |
 |
| Motoring away from the dock |
 |
| Captain |
 |
| Artistic shot from my daughter |
I do have to admit that we cheated just a little bit; we actually took her out on Saturday for her real maiden voyage. This was cautionary. I wanted to make sure that everything worked correctly. Many years in the software business has convinced me not to do live demos but to always test things first.
 |
| Practice rigging with dad. |
 |
| Rigging stored in her. |
 |
| Three build amigos |
 |
| At the boat ramp. |
 |
| Launching |
A funny thing happened here though. Suddenly we saw that the footwell was filling with water. That was bad, very bad. But when I traced the leak, it was coming from above the waterline from the sole. I couldn't figure out how the water could be coming from up there.
Turns out it was a leaky water bottle. Whew!
 |
| About to head out |
 |
| Quincy at the helm |
 |
| Dad and me |
 |
| Victory! |
I've still got things to do to finish her.
I plan to continue this blog, but I'll be changing the name to Sailing 284. I want to cover the small boat sailing adventures.
Subscribe to:
Posts (Atom)